 In this guide we will go through:
- The benefits of personalization
- How to add personalization to your landing pages:
- Inline Recommended
- Using the new user banner No code
Why personalization?
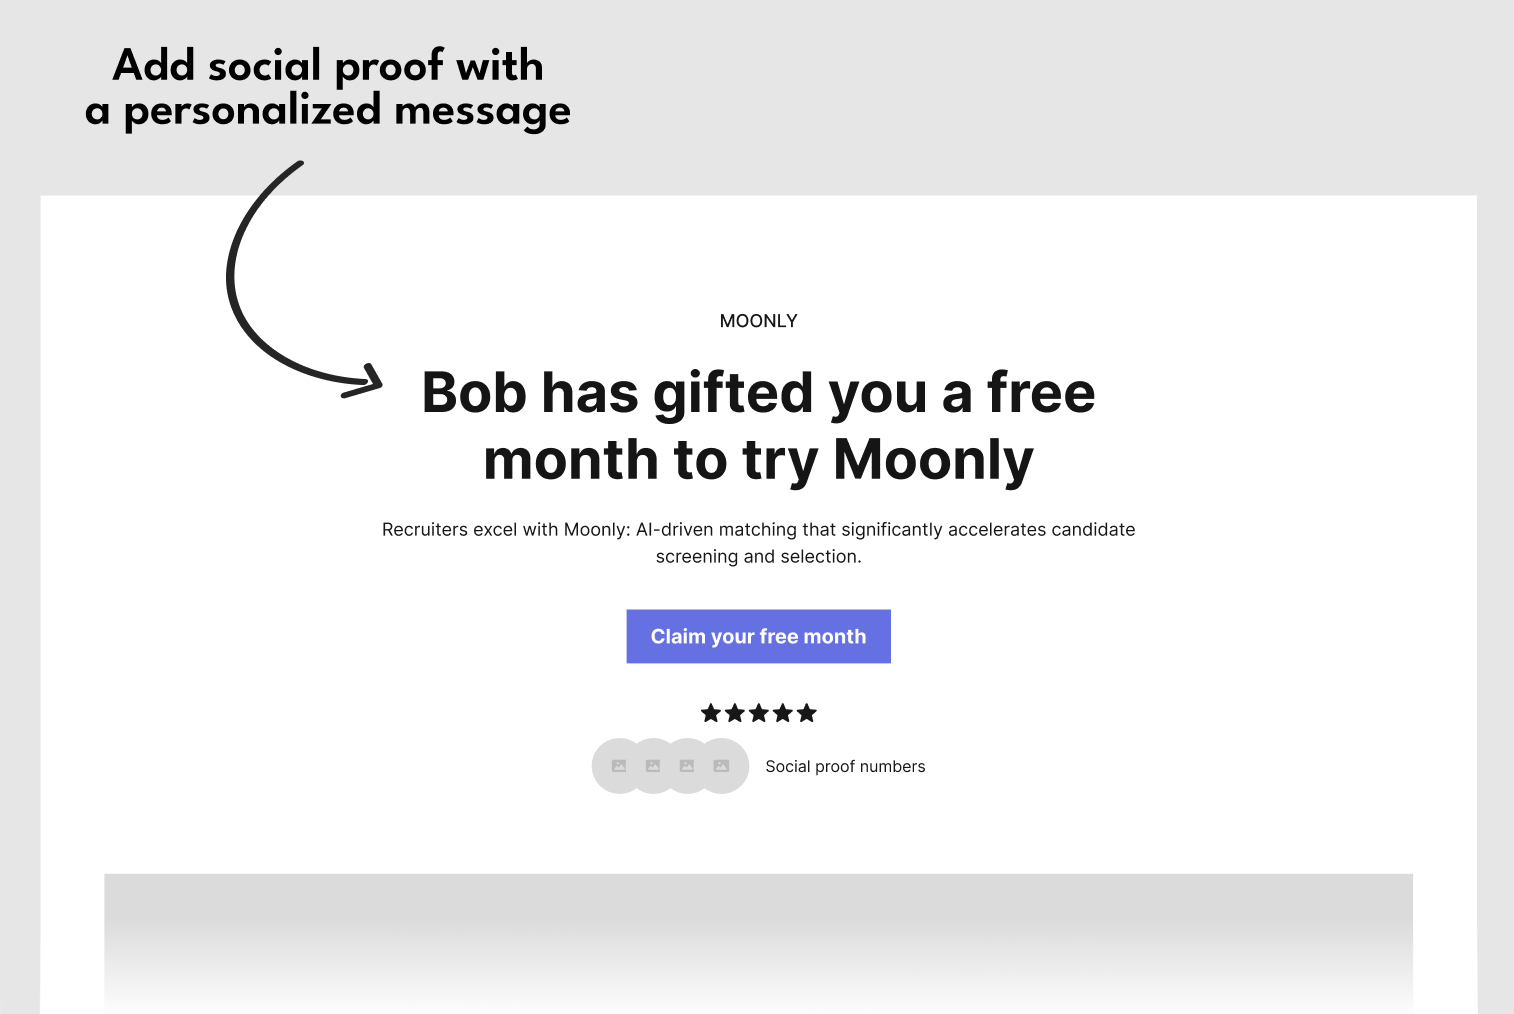
Personalization and social proof, such as including the referrer’s name in the landing page headline, are crucial for converting referees into signed-up users due to several key reasons:- Enhanced Trust and Credibility: Seeing a familiar name like “Bob has gifted you a free month to try Moonly” immediately establishes a sense of trust. The referee recognizes the referrer, which lends credibility to the offer.
- Increased Relevance and Engagement: Personalization makes the offer feel more tailored and relevant to the referee. A message that appears to be handpicked for them can create a stronger emotional connection and engagement with the content, increasing the likelihood of a positive response.
- Leveraging Existing Relationships: Utilizing the referrer’s name capitalizes on the existing relationship between the referrer and the referee. This relational dynamic can be a powerful motivator, as referees often value and trust the opinions and choices of their friends or contacts.
- Creating a Sense of Community and Belonging: Personalized messages can give referees the feeling of being part of an exclusive group or community, especially when the message implies a gift or a special offer from someone they know. This sense of belonging can be a strong incentive to join and participate.
- Reducing Perceived Risk: For new users, trying a new service involves some level of perceived risk or uncertainty. A personalized referral reduces this perceived risk, as it comes with an implicit endorsement from someone the referee trusts.
- Emotional Appeal: Personalized messages can evoke an emotional response. Knowing that a friend or acquaintance has thoughtfully extended an offer can create feelings of appreciation and reciprocity, further encouraging the referee to sign up.
To show the referrer name to the new user, you need to make sure that their user details are passed in the referral component.
Add personalization to the Headline or other page element
Recommended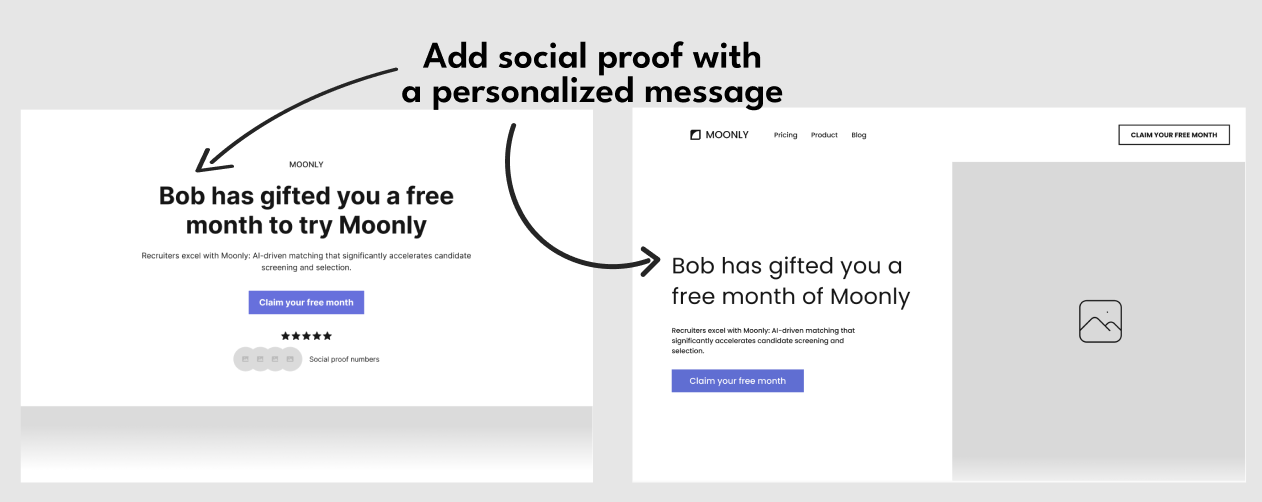 To add the referrer’s name to an element on the page that the new user lands on when following an invite link, you need to follow these steps:
Turn personalization on for your product
Go to New User Experience setup in Cello Portal -> Personalization tab and add personalization.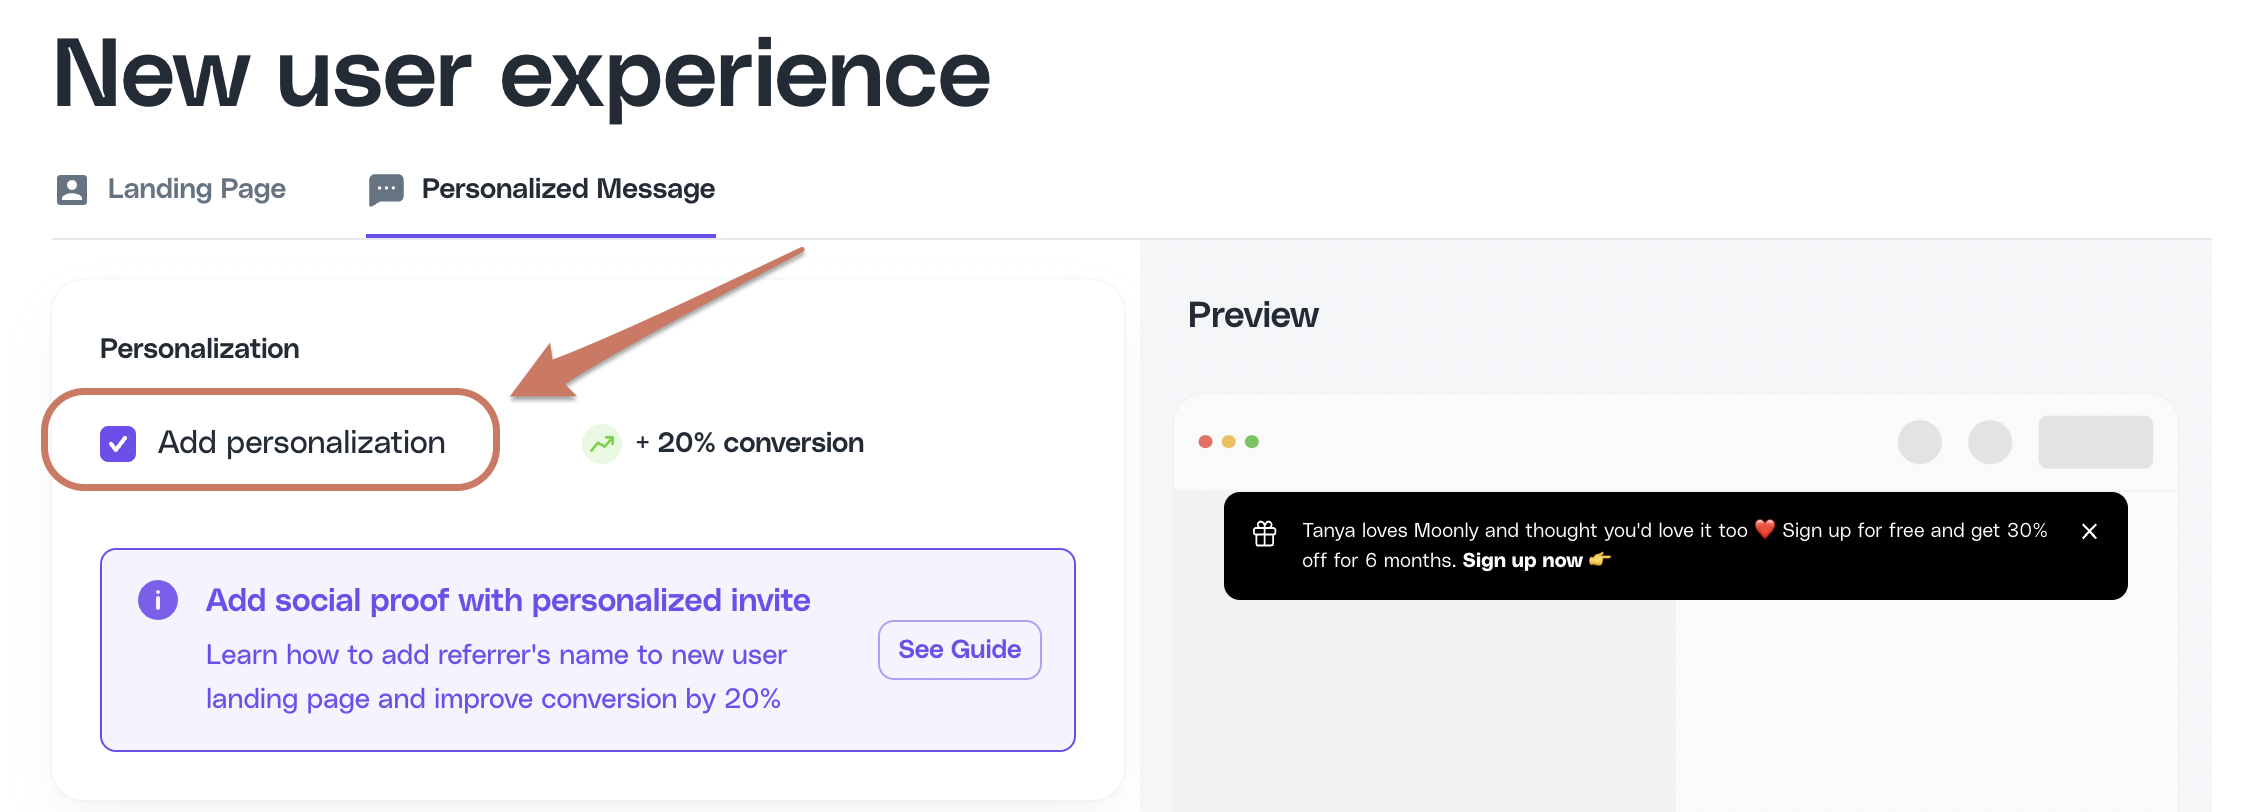 When personalization is turned on, an extra parameter will be added to the URL of your landing page, e.g.
 celloN=VGFuamE
Use the attribution script methods to get referrer information
Attribution script provides a JS methodgetReferrerName() to fetch the name of the referrer.
Complete Integration Example
Use attribution script methods to get referral data:Add personalization with the New user banner
No code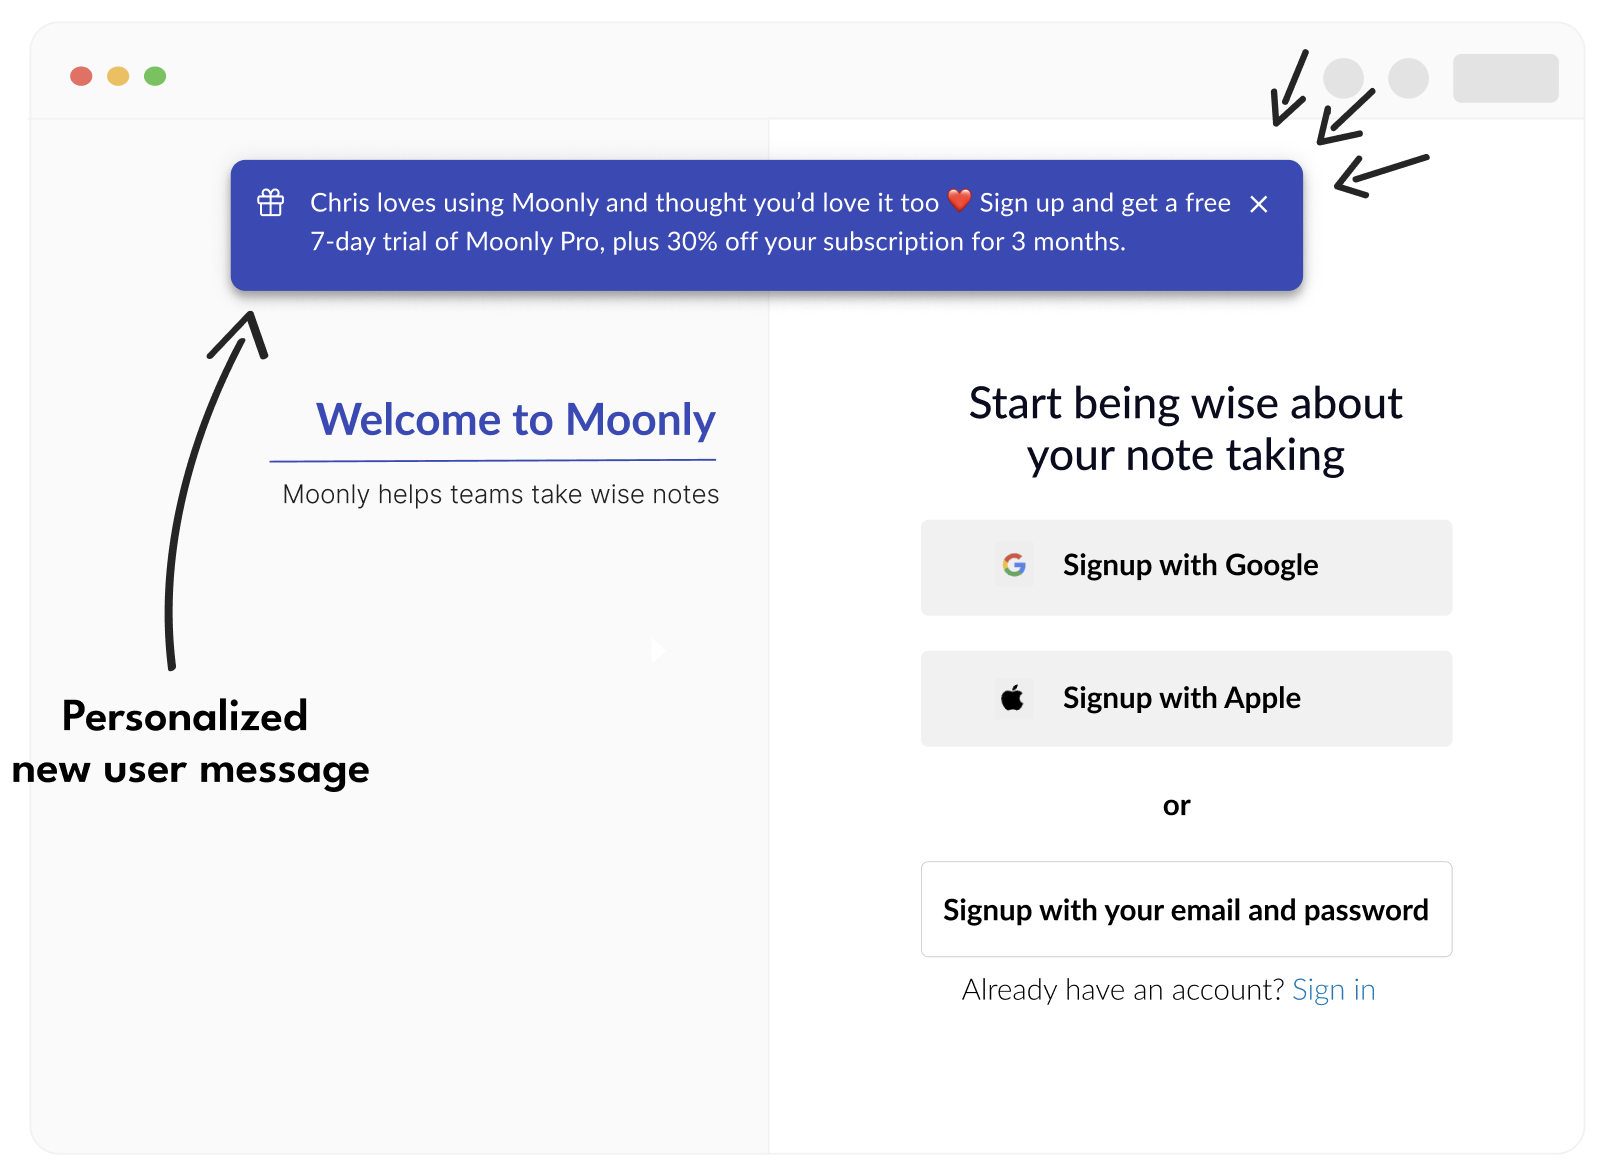 The banner is easily added in a few steps:
- Add Cello attribution script to your landing page.
- Go to New User Experience setup in Cello Portal -> Personalization tab and turn the banner on.
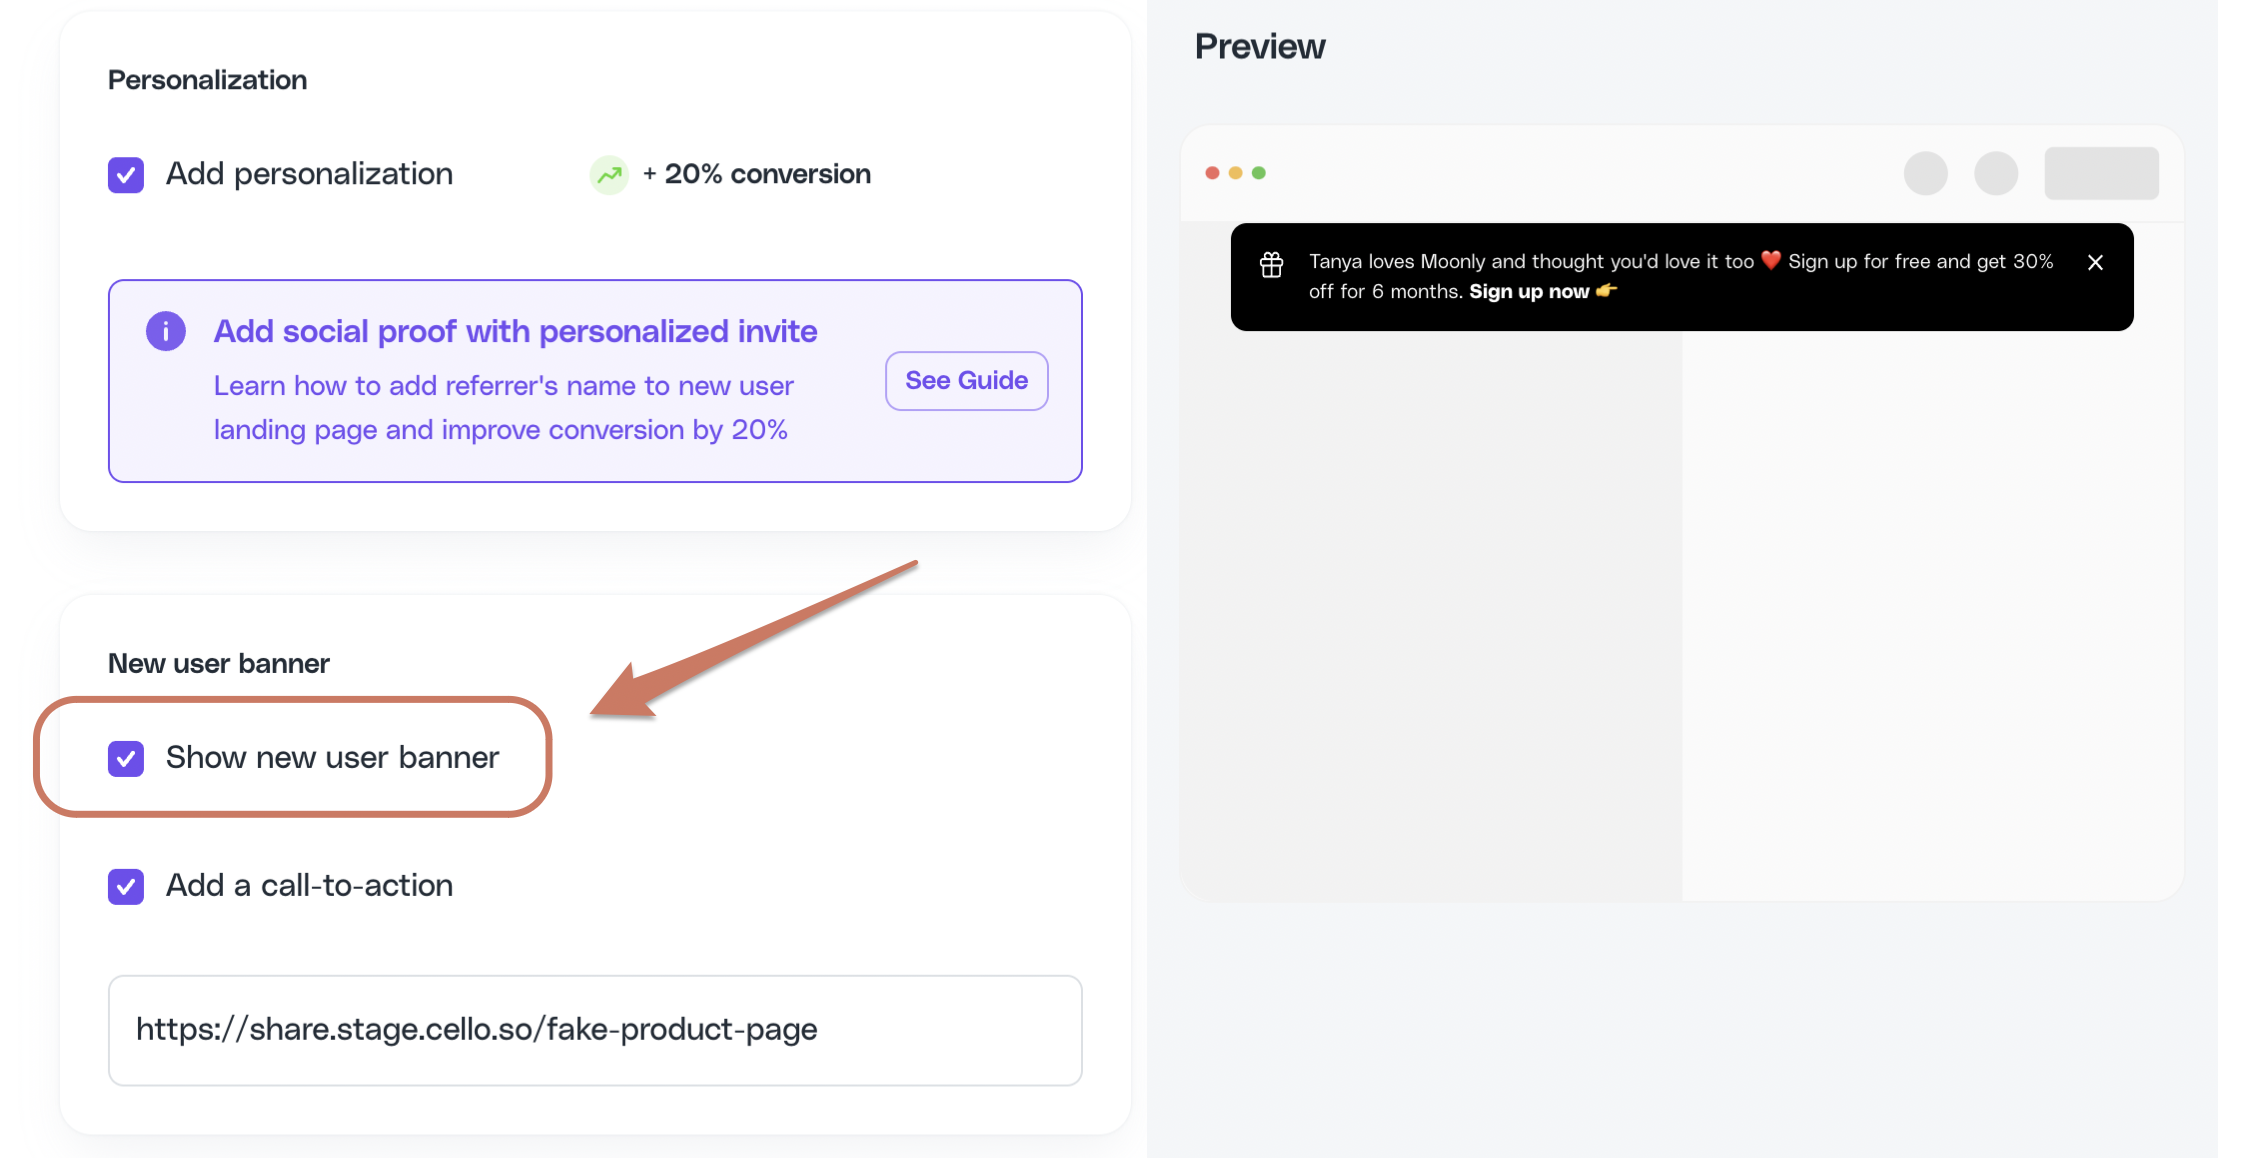 Visitors who follow the Cello invite link will have a banner displayed with an offer and the name of their referrer.
The Portal toggles the banner on/off and exposes any visual styling options. The banner copy (message text, CTA wording) is managed by Cello and is not editable self-serve - contact your CSM or support@cello.so to request copy changes. The same applies to widget onboarding text, offer descriptions, announcements, and email body copy. See Texts and copy.