Overview
This guide walks you through building a no-code Zapier workflow that:- Watches HubSpot for deals moving into a specific stage (e.g. “Demo Done”)
- Filters deals to only those with a captured
uccreferral code - Authenticates with the Cello API to obtain an access token
- Sends a signup event to Cello using the
POST /eventsendpoint
Prerequisites
Before you start, make sure you have:- A HubSpot account with deals flowing through your sales pipeline
- A Zapier account (Starter plan or above — Code by Zapier steps require a paid plan)
- A Cello account with API credentials (
accessKeyIdandsecretAccessKey) — generate these in the Cello Portal - A
uccproperty on your HubSpot deal or company object, populated when the referral lands. Follow the HubSpot Forms attribution guide to set this up. - Cello JS Referral Component integrated in your product so referrers can share referral links
The completed Zap
Your finished Zap will have four steps: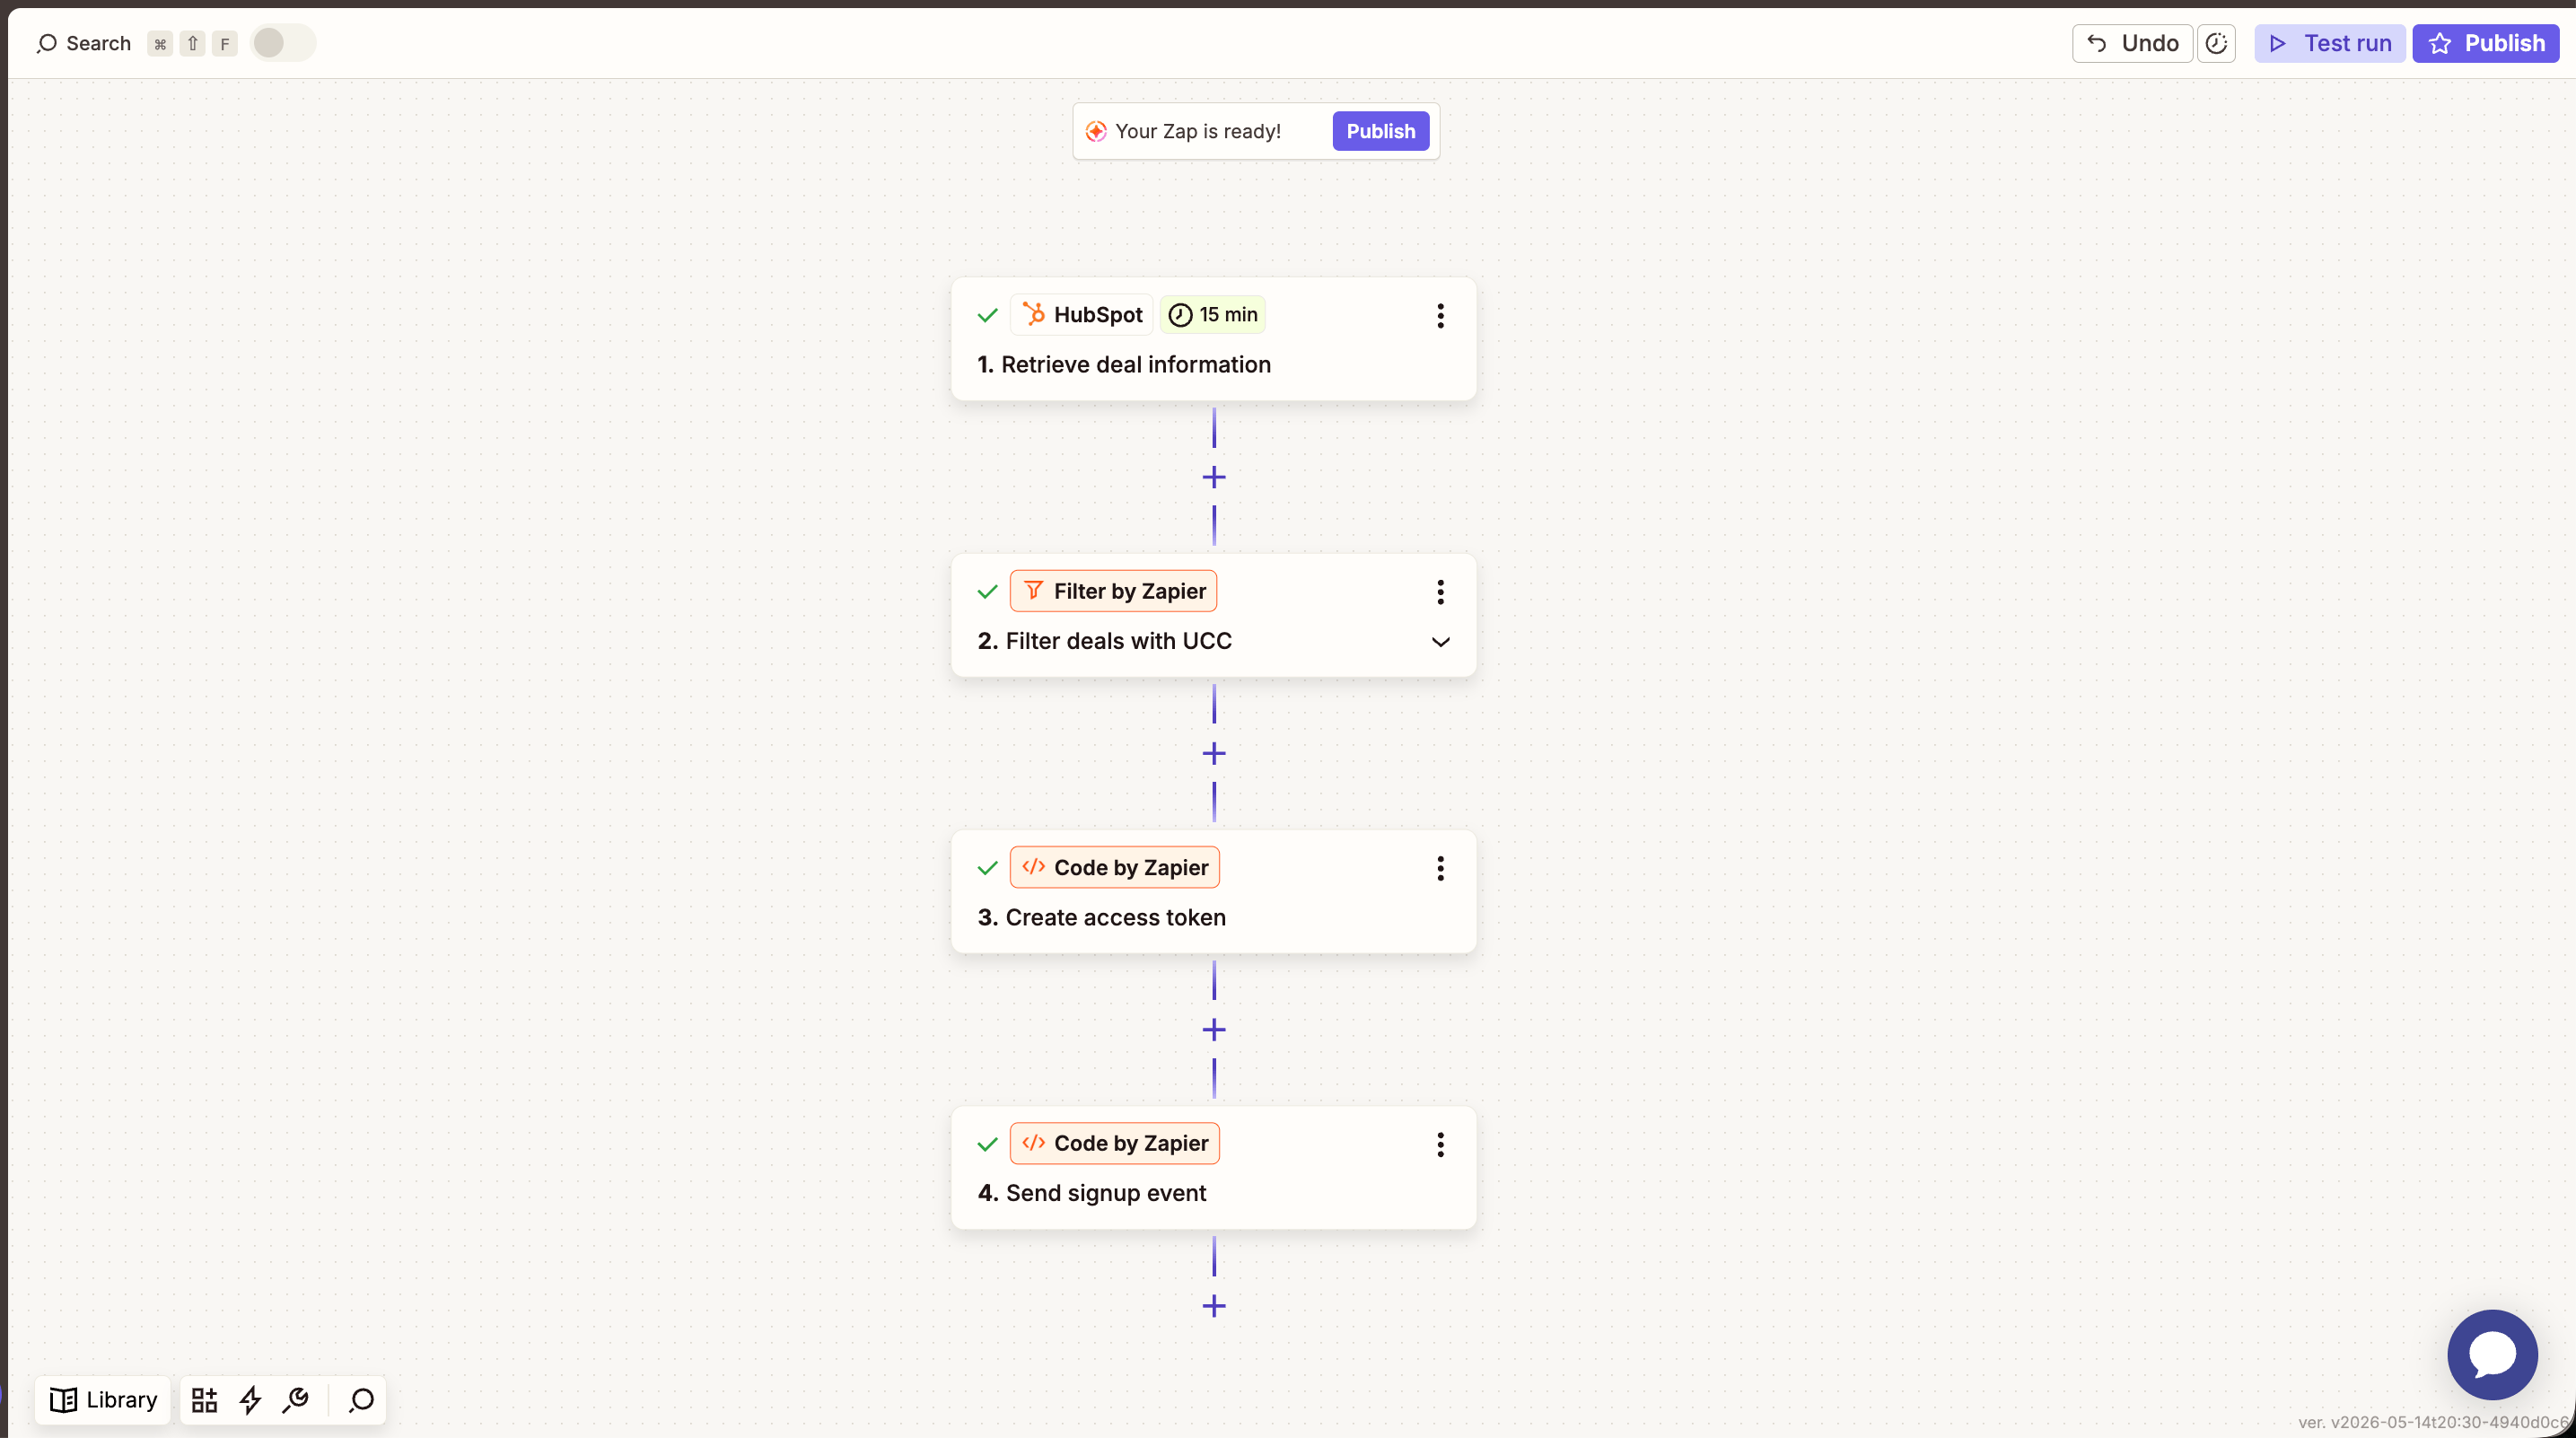
Step 1: Trigger on HubSpot deal stage change
The Zap fires whenever a deal enters the stage you choose (typically the one that represents a qualified conversion — “Demo Done”, “Purchase Consideration”, or similar).- In Zapier, create a new Zap and choose HubSpot as the trigger app.
- Pick the event “Deal in stage” (or “Deal Property Changed” depending on your HubSpot plan).
- Select your Deal Pipeline and the Deal Stage that should trigger the event (e.g.
Demo Done/Purchase Consideration). - Under Additional properties to retrieve, add the
uccproperty so it’s available in later steps.
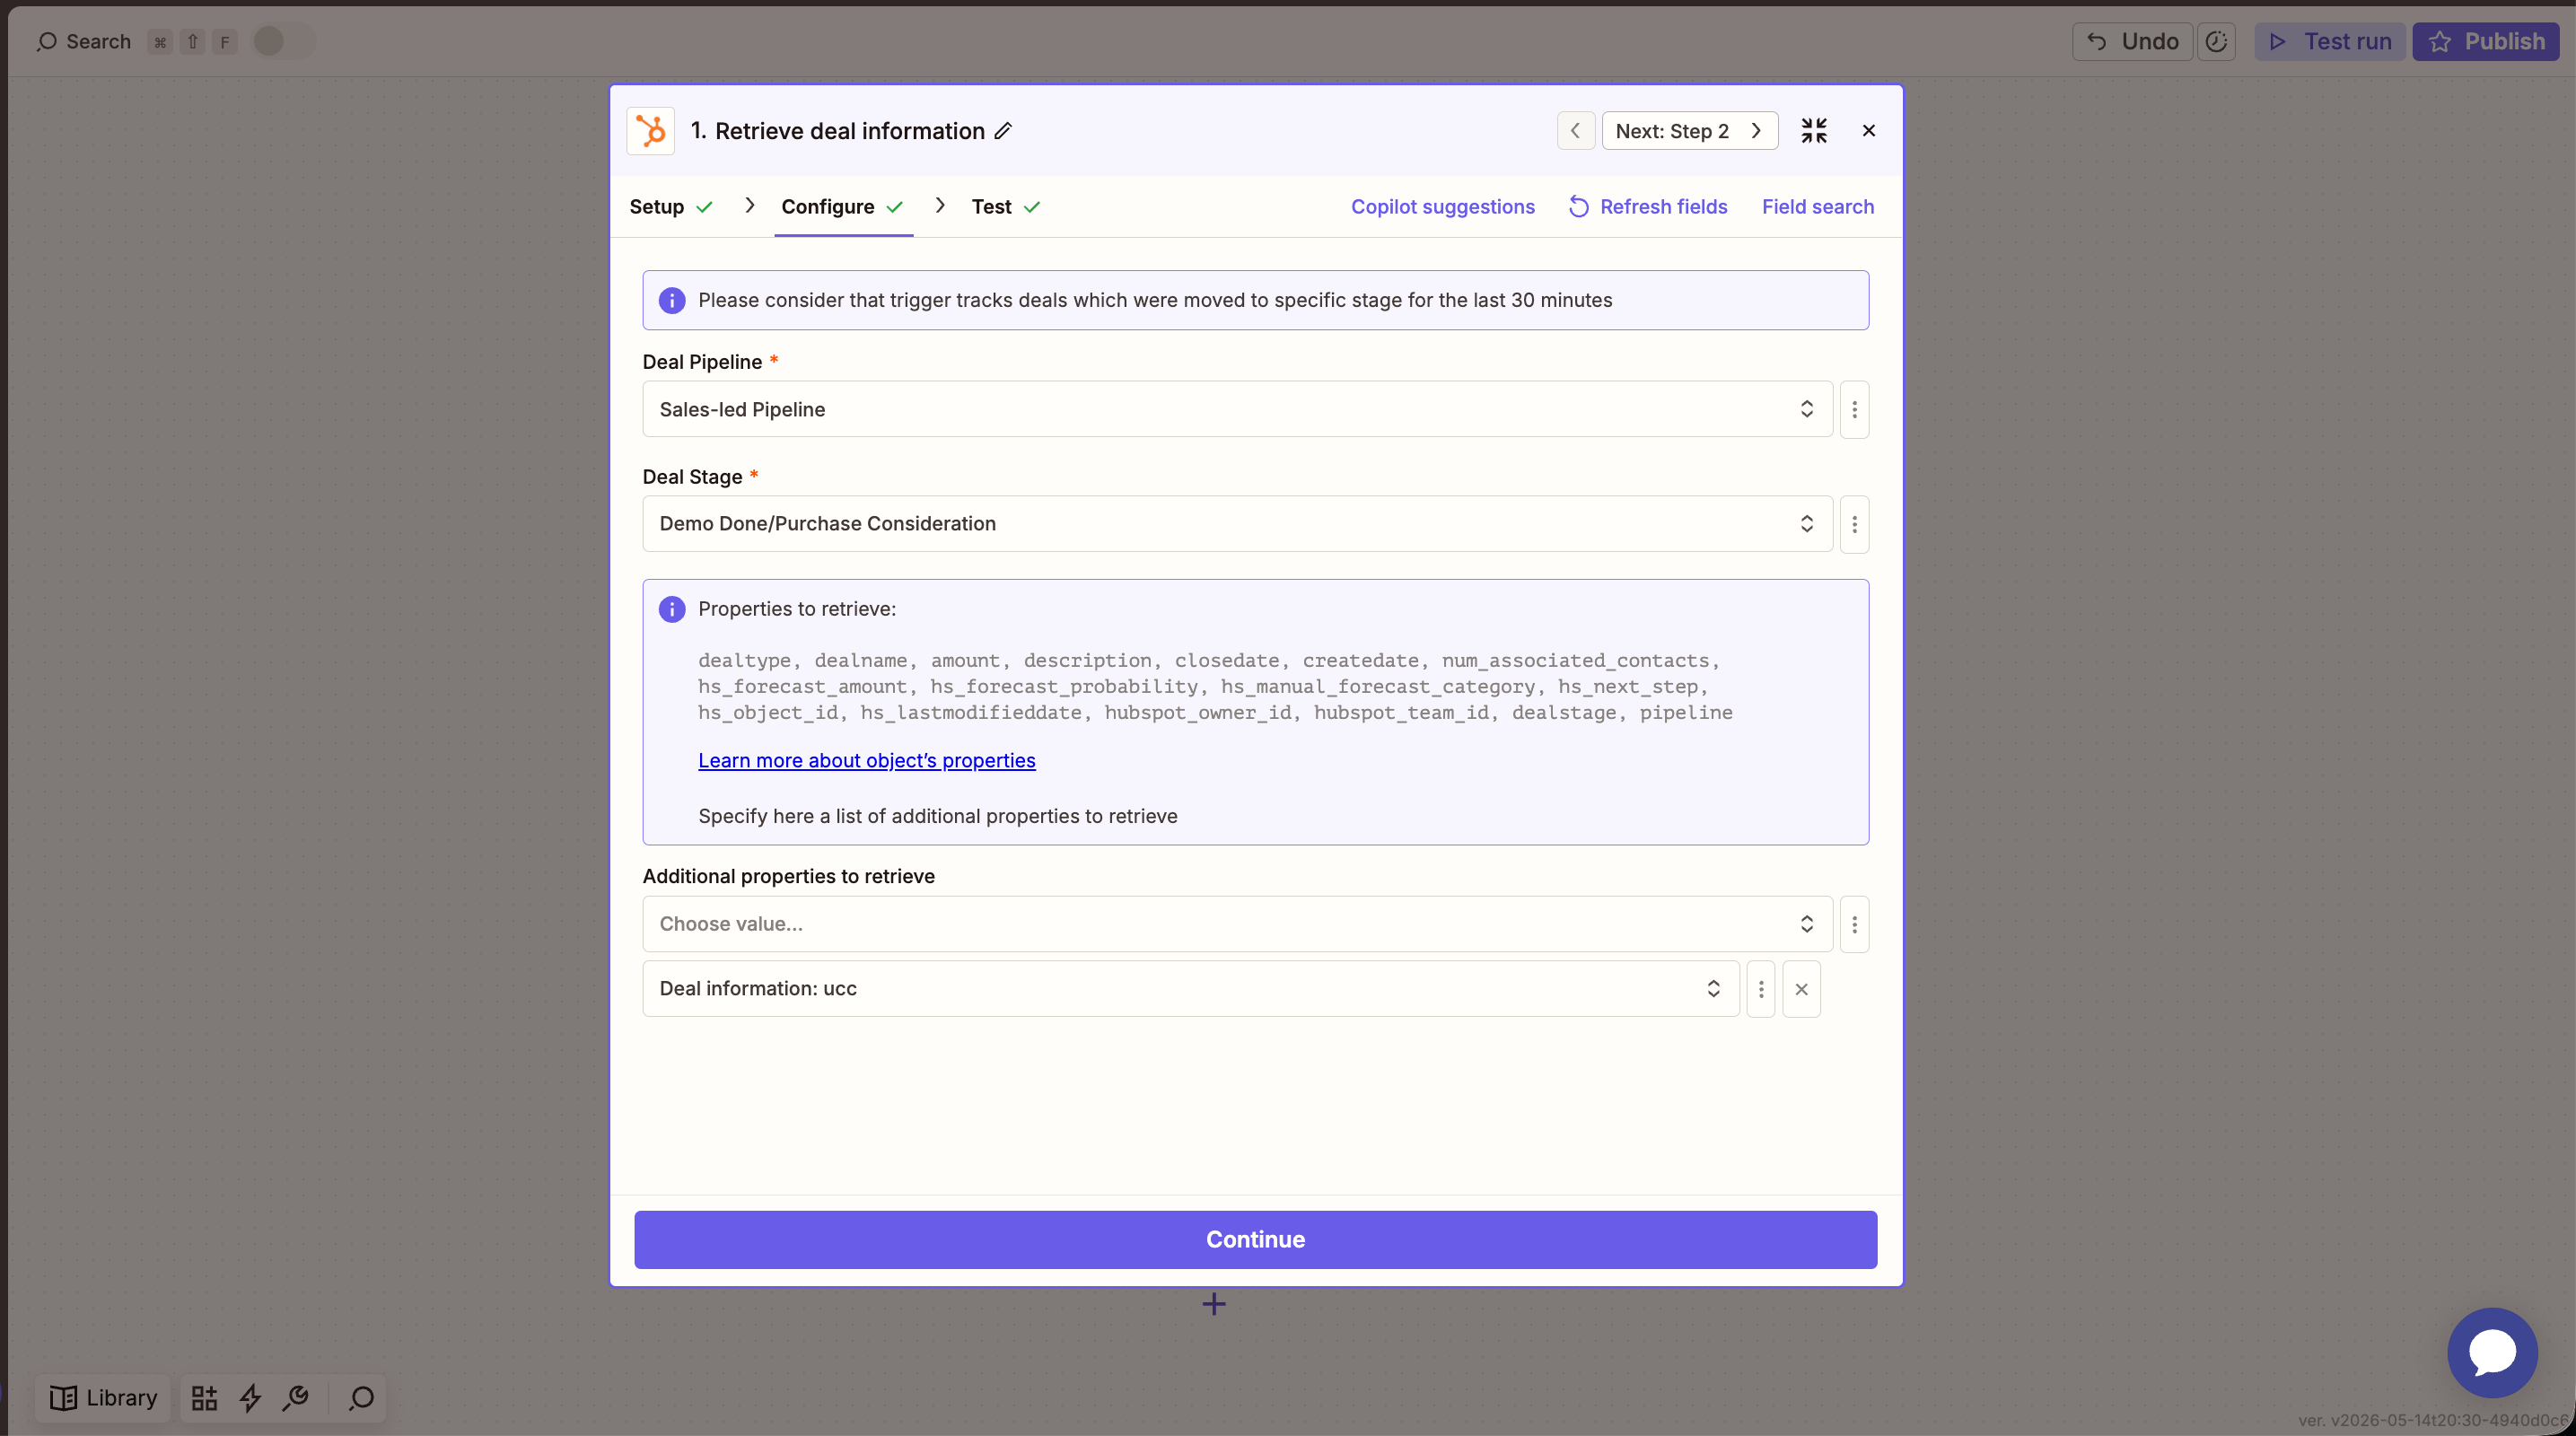
The HubSpot trigger checks for matching deals every 15 minutes and only picks up deals moved into the stage in the last 30 minutes. Plan your stage transitions accordingly.
dealname, hs_object_id, ucc, plus any contact/company info you want to forward.
Step 2: Filter deals without a ucc
You only want to send events for deals that came from a referral. Add a Filter by Zapier step:
- Choose Filter by Zapier.
- Set the rule to:
1. Deal information: uccExists.
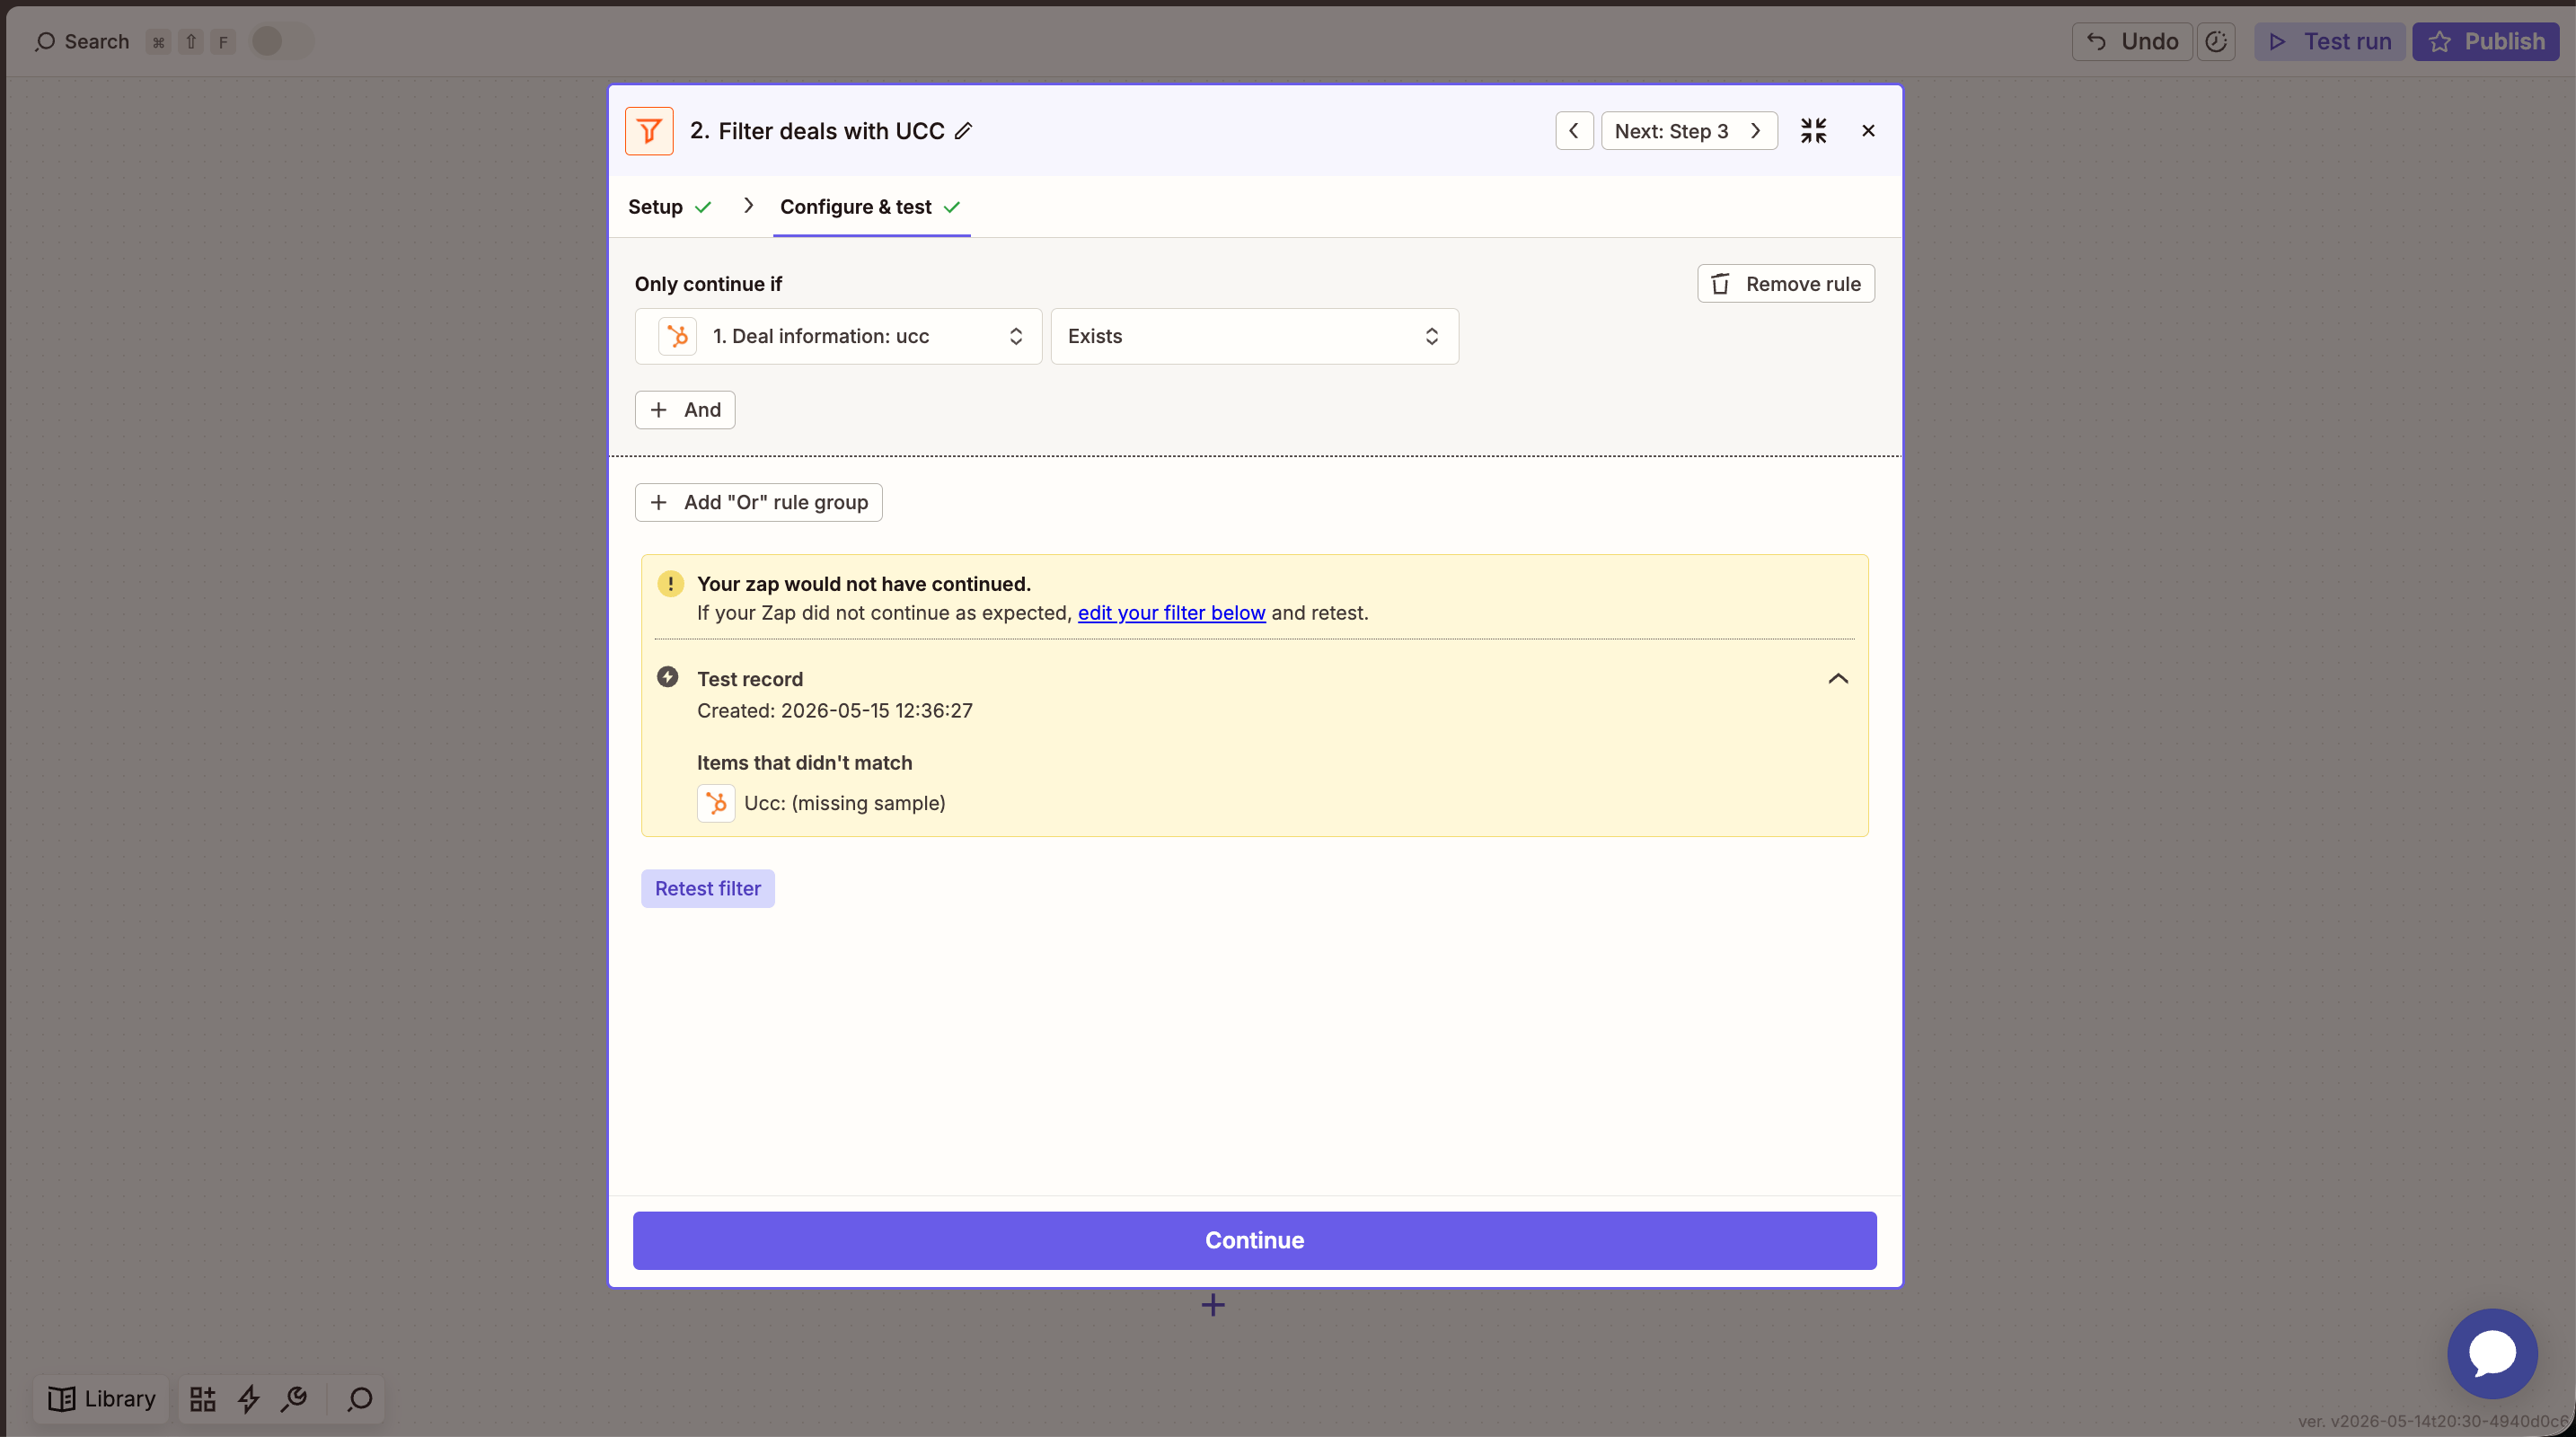
ucc will stop here and no Cello event will be sent.
Step 3: Create a Cello access token
Cello uses short-lived access tokens for API auth. Add a Code by Zapier step using Python:- Choose Code by Zapier → Run Python.
- Leave Input Data empty (credentials are hardcoded in this step).
- Paste the snippet below and replace
<accessKeyId>and<secretAccessKey>with your Cello API credentials.
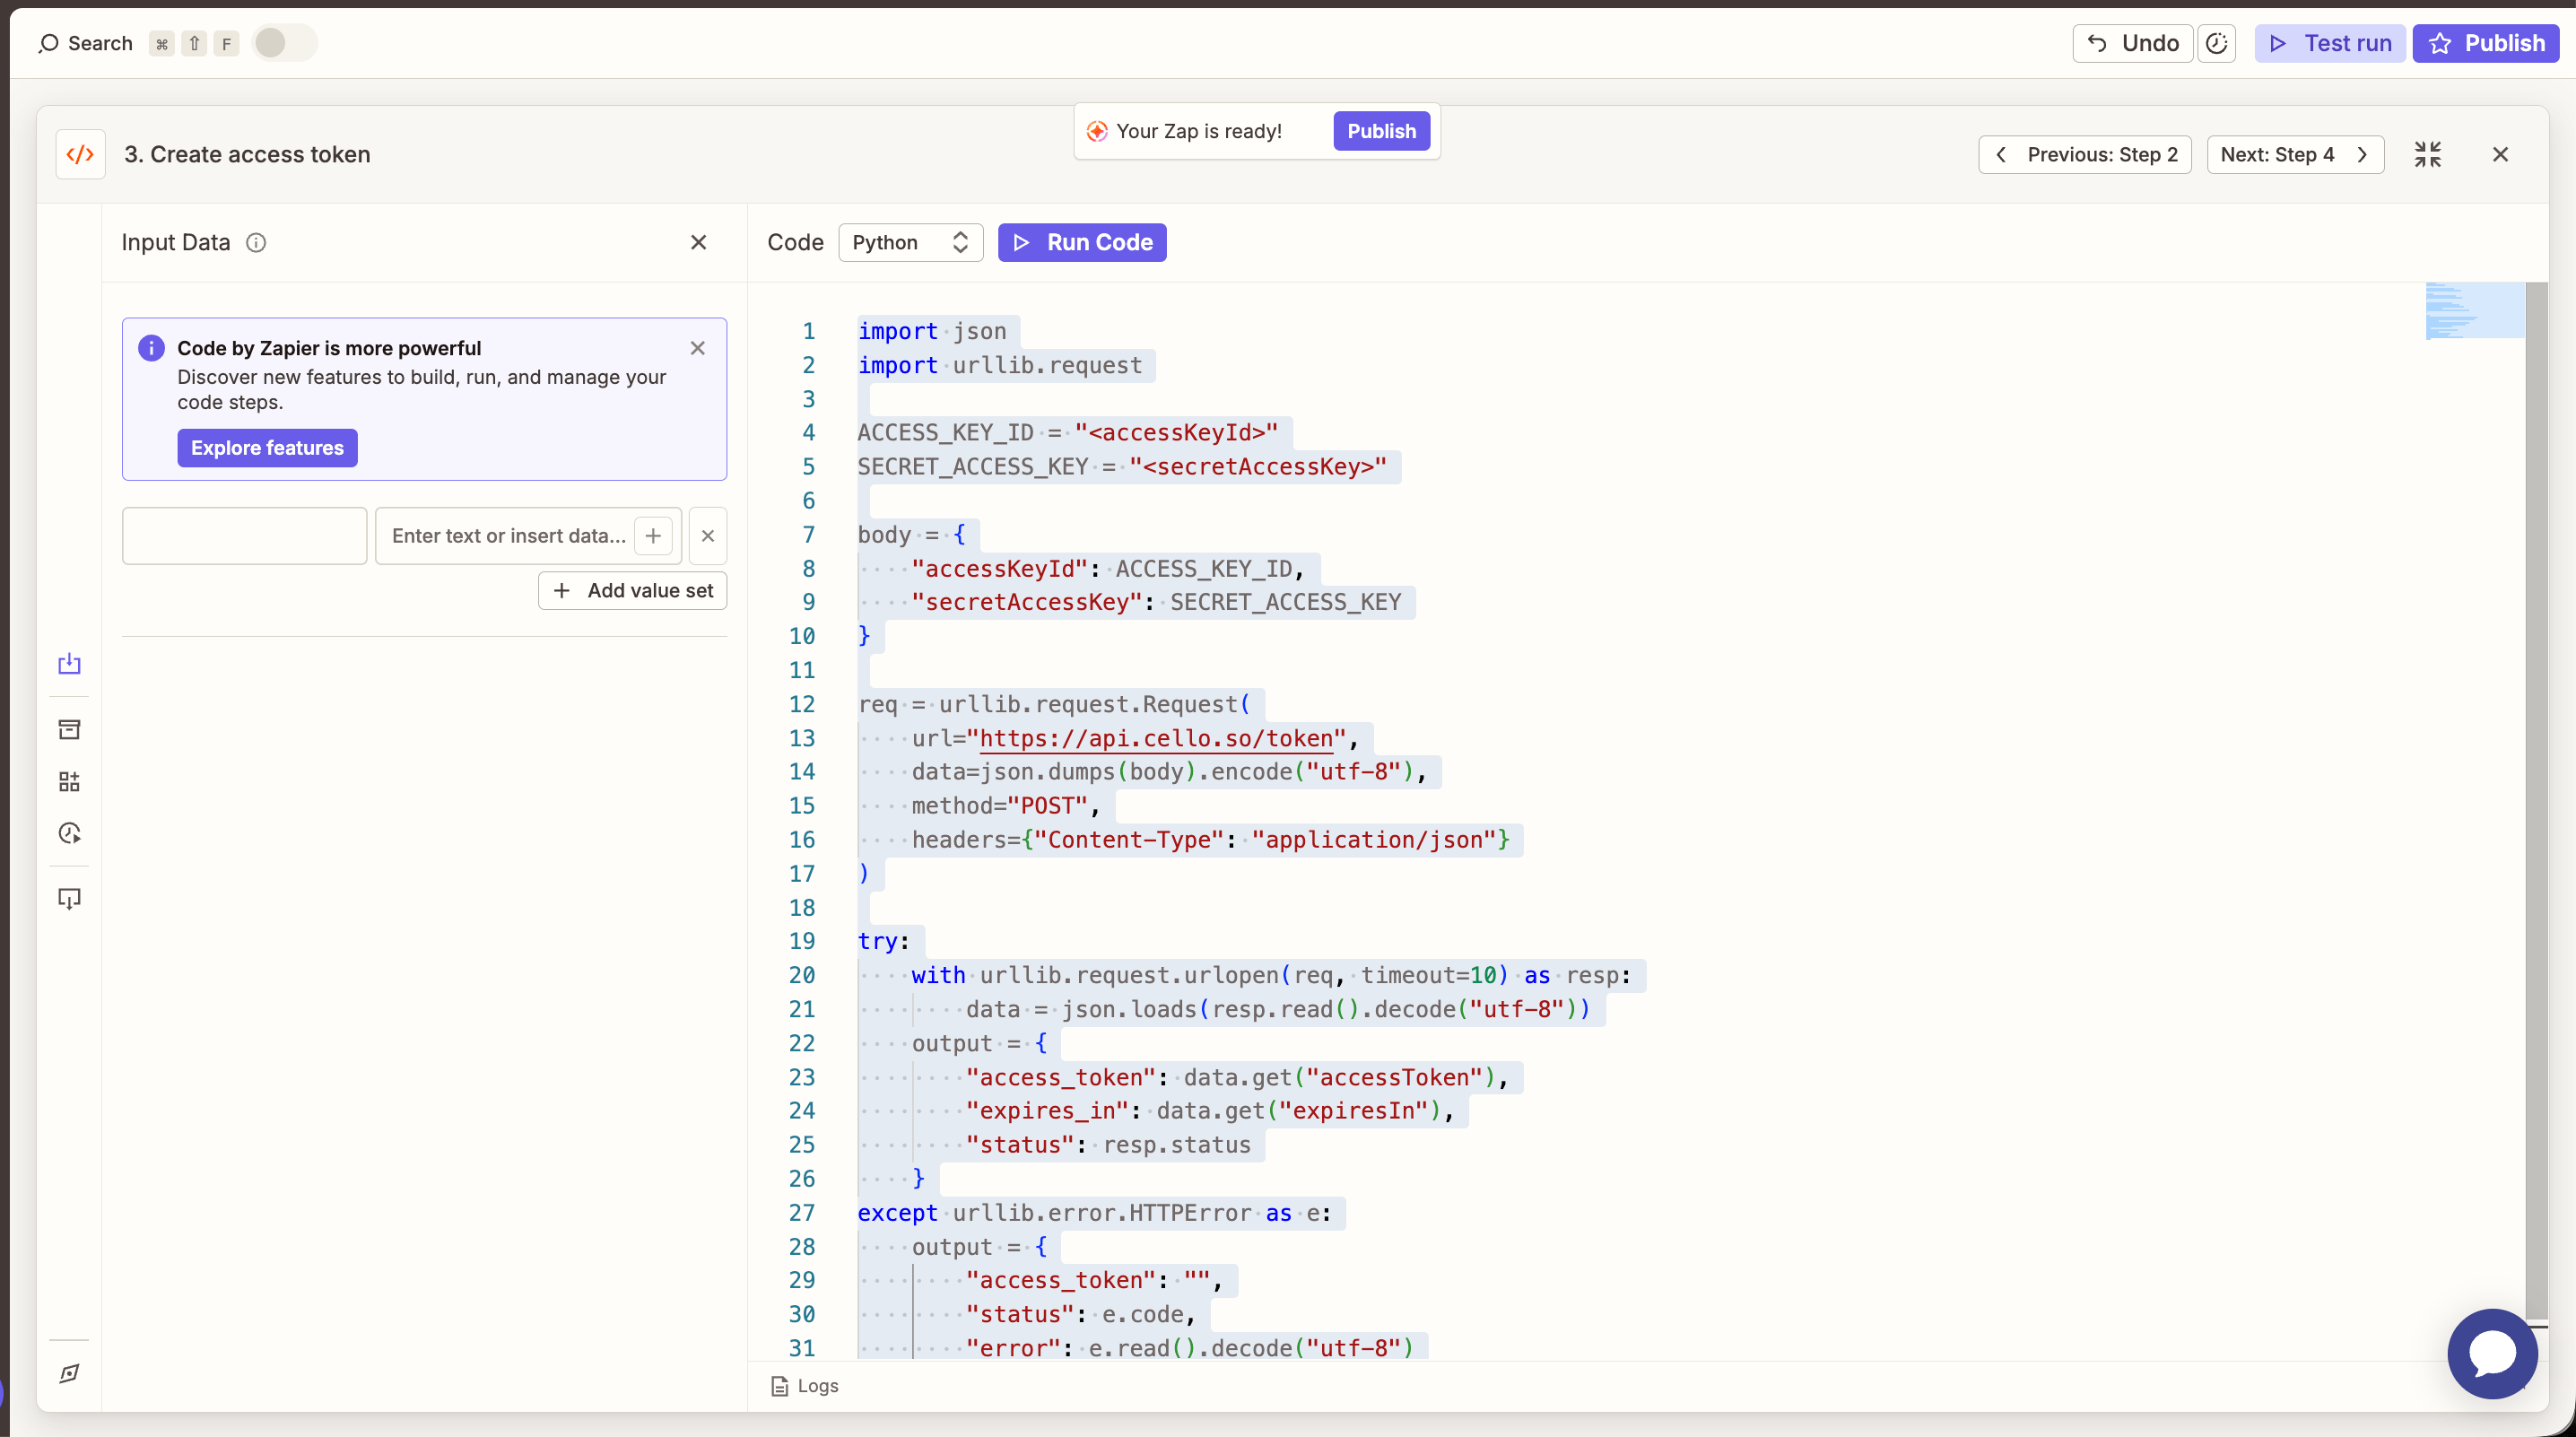
access_token value and status: 200 in the output.
Reference: Cello Authentication API.
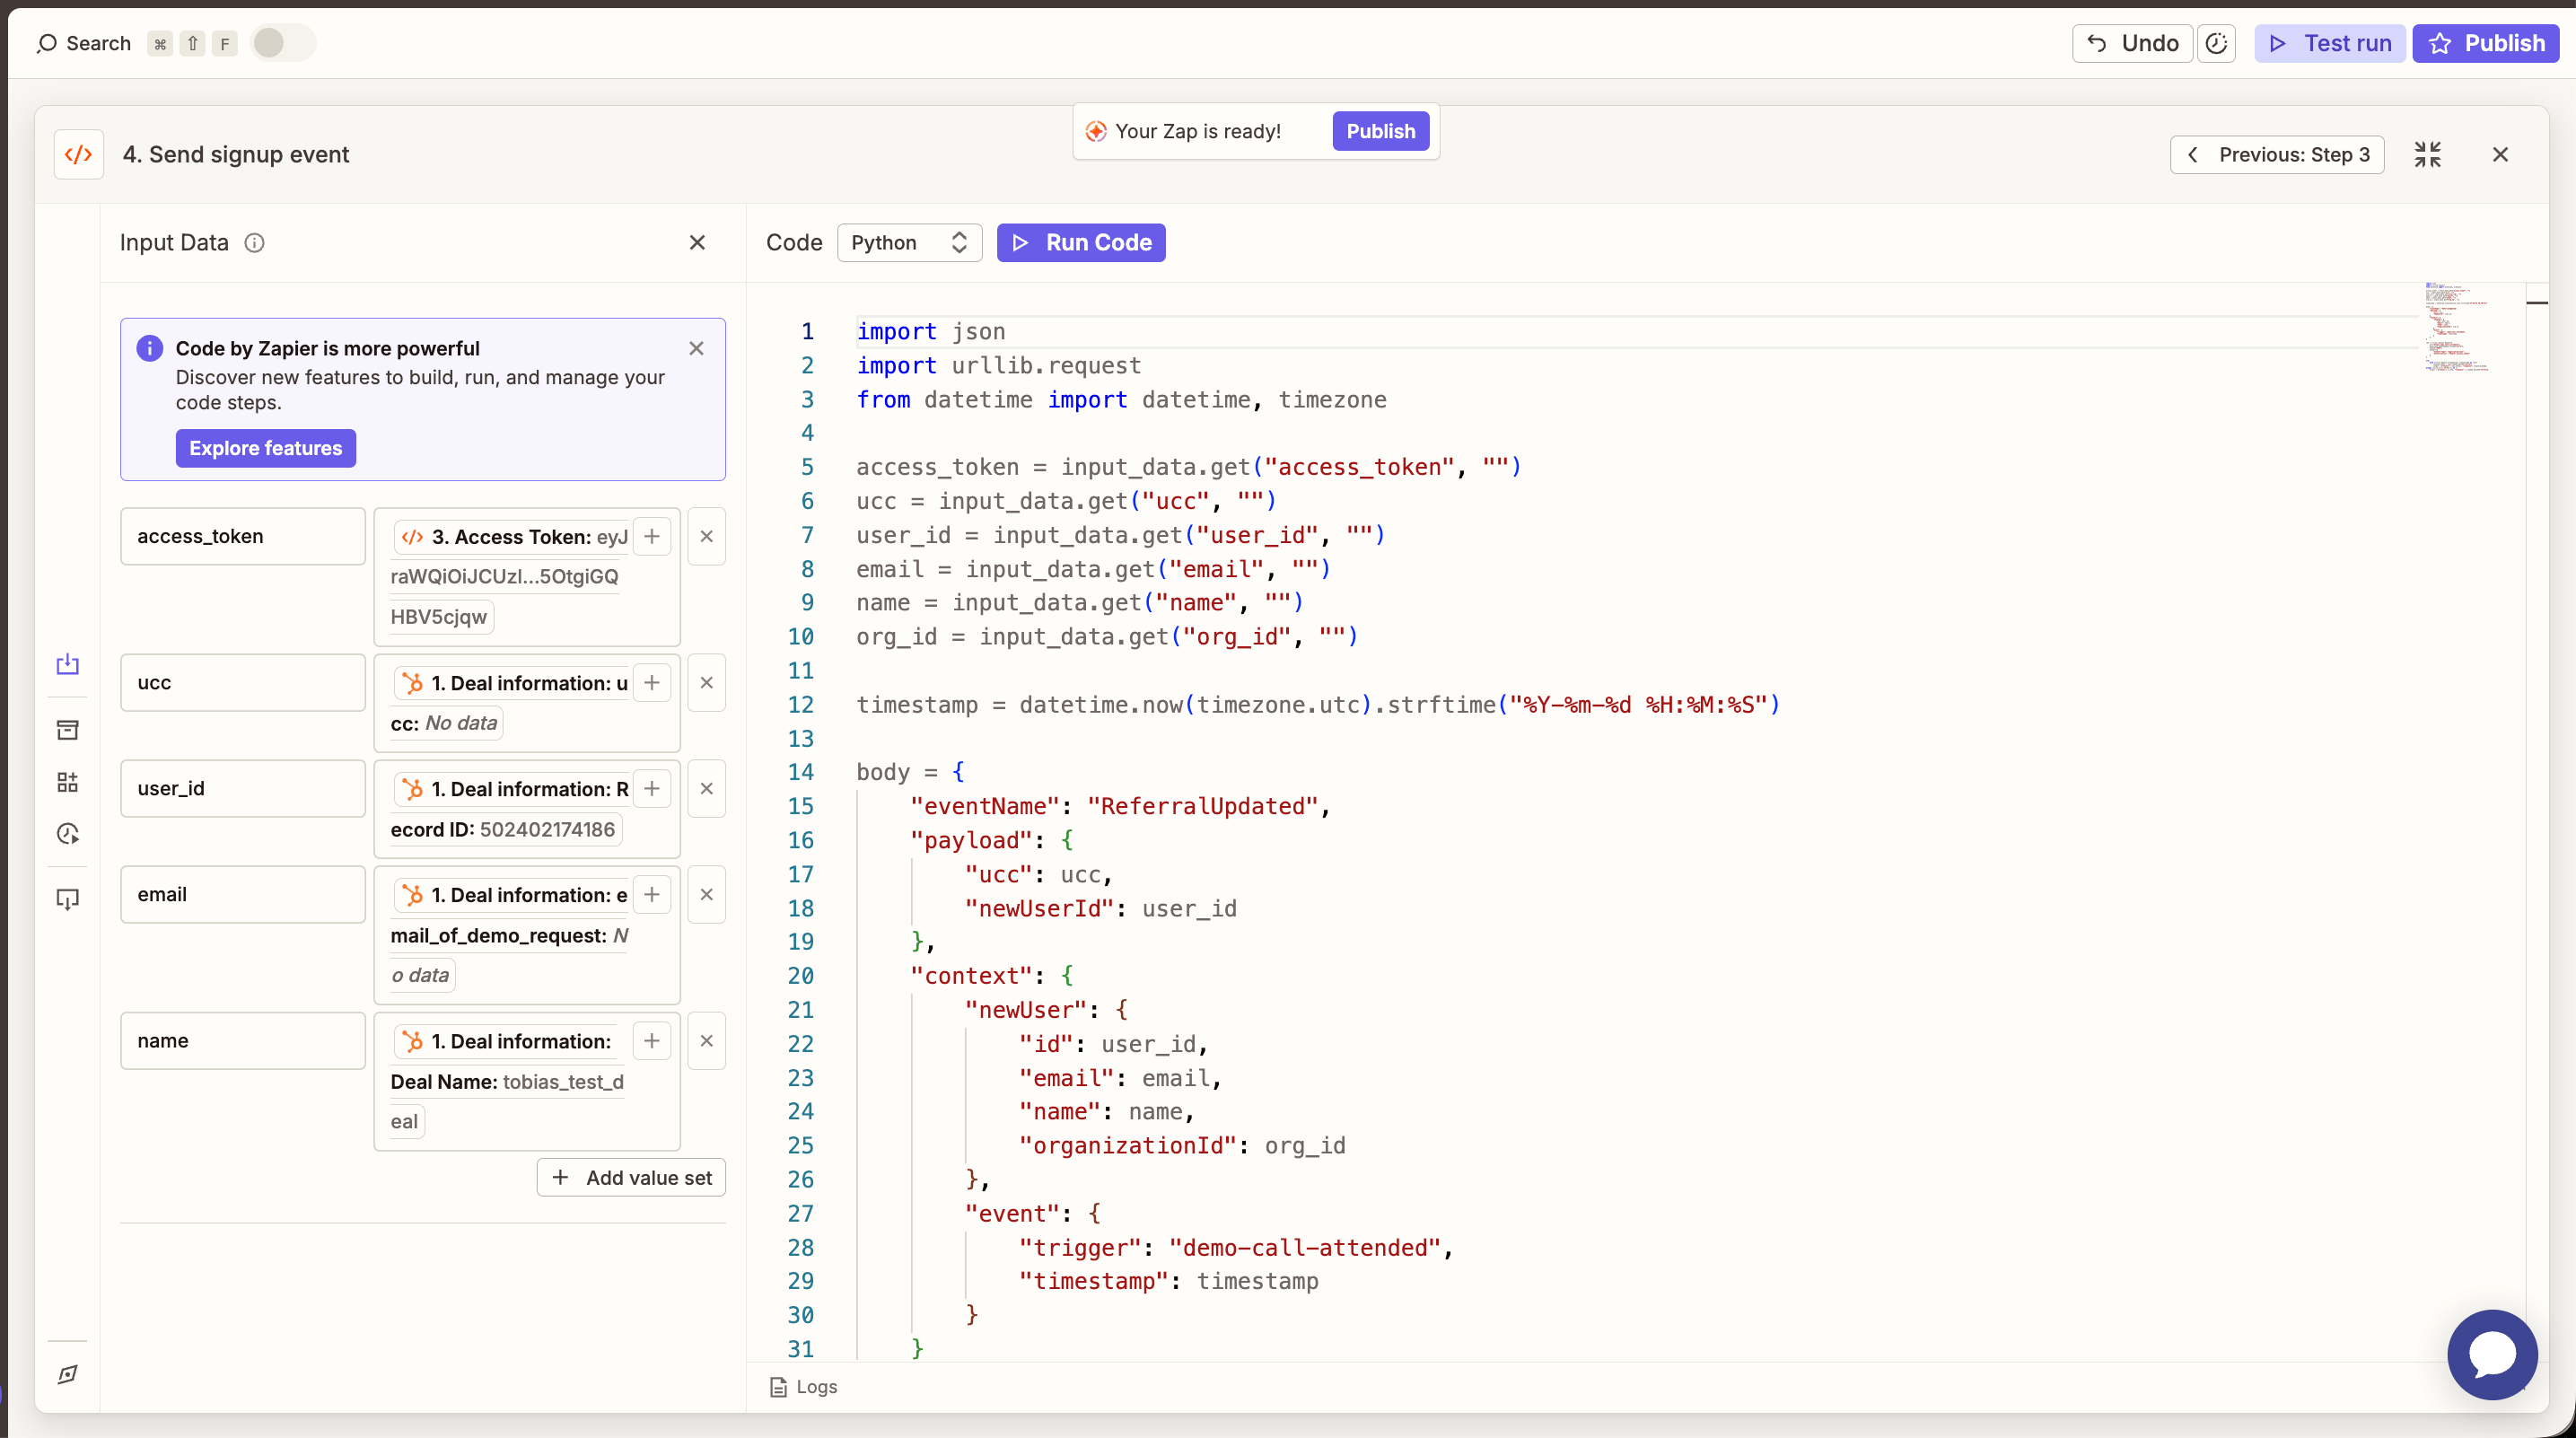
Step 4: Send the signup event to Cello
Add a second Code by Zapier (Python) step that posts the event toPOST /events.
- Choose Code by Zapier → Run Python.
-
Map the following Input Data fields from the previous steps:
Input Data key Map from access_tokenStep 3 → Access TokenuccStep 1 → Deal information: uccuser_idStep 1 → Deal information: Record ID(or your own product user ID property)emailStep 1 → Deal information: email_of_demo_request(or contact email)nameStep 1 → Deal information: Deal Name(or contact name)org_idStep 1 → company / organization ID (optional) - Paste the snippet below:
The
event.trigger value (demo-call-attended in this example) determines how Cello classifies the event. Common values:new-signup— user signed up but no demo yetdemo-call-attended— user attended a sales/demo callqualified-lead— user has been qualified by sales
status: 200 from Cello.
Step 5: Verify and publish
- Publish your Zap.
- Move a test deal into the trigger stage in HubSpot.
- Wait up to 15 minutes for Zapier to pick up the change.
- Open the Event Feed in the Cello Portal and confirm the event was received with the correct
ucc,newUserId, andtrigger. - Check Integration Status — Signups should now show as Connected.
Variations
- Different trigger stages. Duplicate the Zap and change the HubSpot deal stage +
event.triggervalue to track multiple milestones (e.g. one Zap fordemo-call-attended, another forqualified-lead). - Reward at the organization level. Set
newUserIdto the HubSpot company ID instead of the deal/contact ID, and populatenewUser.organizationIdaccordingly. See Tracking Signups for the organization-level attribution model. - Use the Zapier HTTP action instead of Code steps. If you prefer not to write Python, both API calls can be done with Webhooks by Zapier → POST. The body and headers are the same as in the snippets above.